Phil Gallagher: The Untold Story Behind Aquatech and a Life in Surf Photography

Most water photographers know Phil Gallagher as the man from Aquatech. But long before he was helping develop water housings, Phil was chasing some of the heaviest waves on the planet, documenting surf breaks that hardly anyone knew existed and making a living doing what he loved.

I've known of Phil and admired his photography for decades, going right back to our early bodyboarding days around Coffs Harbour.

More recently, I've worked closely with Aquatech through my own water photography, so I thought it was about time to sit down with Phil and hear the full story.

And mate, what a journey he's had!

We ended up chatting for nearly 100 minutes, covering everything from pioneering surf photography adventures to publishing magazines, creating books, making a living from photography and eventually helping shape the future of Aquatech.

There's even a story or two in here Phil reckons he's never told publicly before.

Watch the full conversation below.

Chasing Waves and Making a Living From Photography

Long before digital cameras made everything easier, Phil was travelling around Australia and overseas photographing bodyboarding and surfing for magazines.

Some of my favourite parts of our conversation are the stories from those early days, particularly his adventures trying to find and photograph waves like Shipstern Bluff in Tasmania and The Right in Western Australia.

We're talking long hikes, rough conditions, secret locations and a fair bit of uncertainty about what they'd actually find.

One story that really stood out was Phil turning down offers of serious money from surf magazines because he'd promised to keep a particular wave secret.

Anyone who's spent time around surf culture will appreciate that one.

It's a fascinating insight into an era of surf photography where discovering and documenting new waves was as much a part of the adventure as taking the photographs themselves.
From Surf Magazines to Photography Books

Phil's career didn't stop at shooting photographs for magazines.

He eventually became involved in publishing, producing his own work and learning the business side of photography.

We talk about his early book Deluxe, independent magazines, and the creative freedom that comes with making something entirely your own.

One of the more recent projects we discuss is his photography book with Australian surfer Noah Deane.

That project came during the COVID years, when Phil had stepped away from his role with Aquatech and returned to working as a photographer.

It's an interesting part of the conversation, particularly hearing how the project came together and some of the challenges along the way.

As someone who's been making a living from photography for more than 20 years myself, I found this part of Phil's journey particularly relatable.
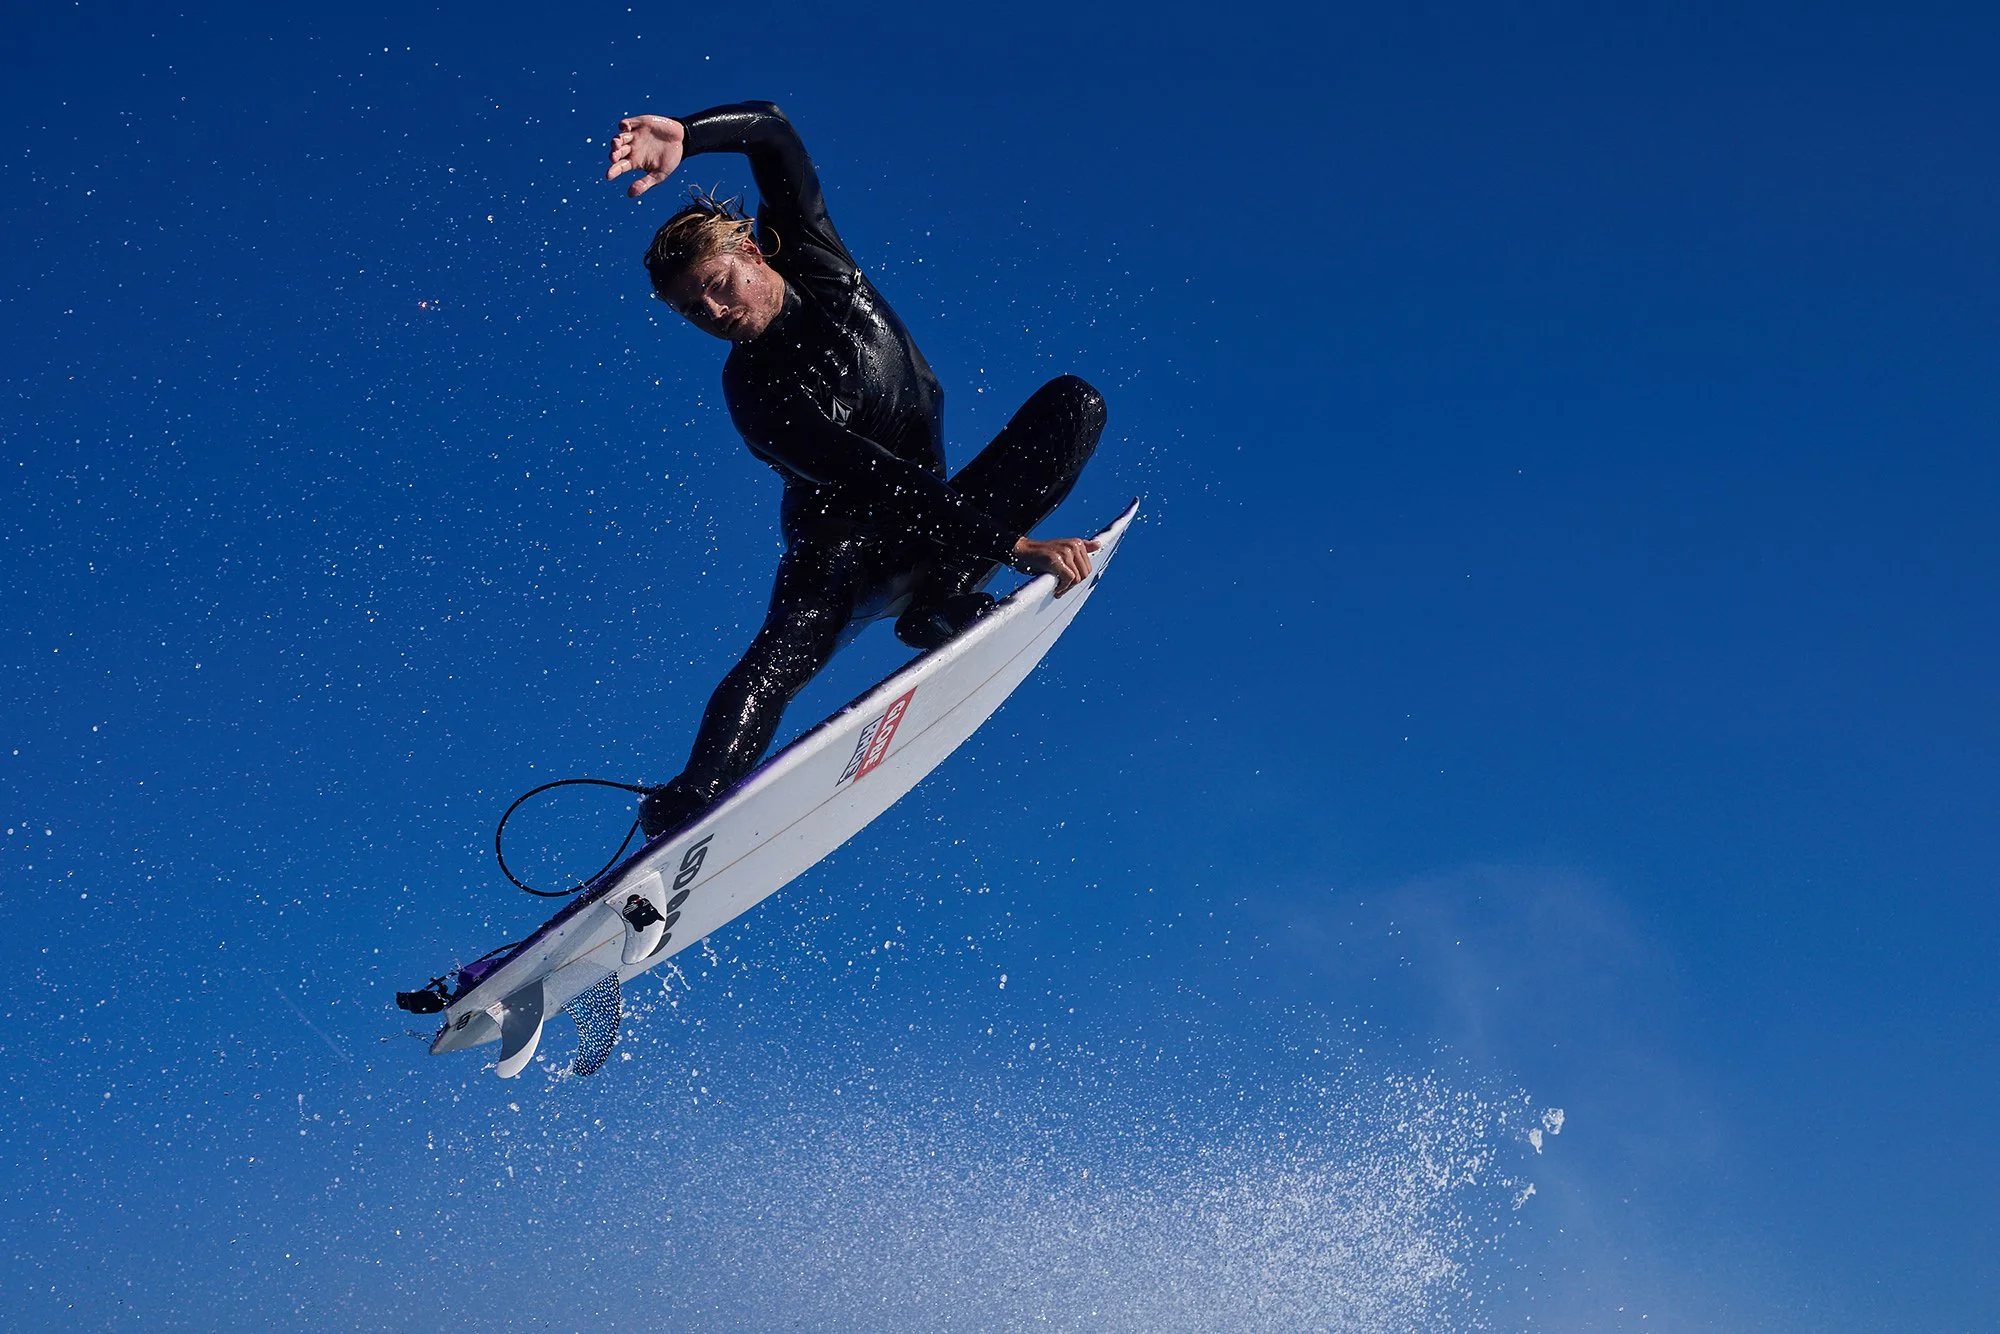
From Photographer to Aquatech

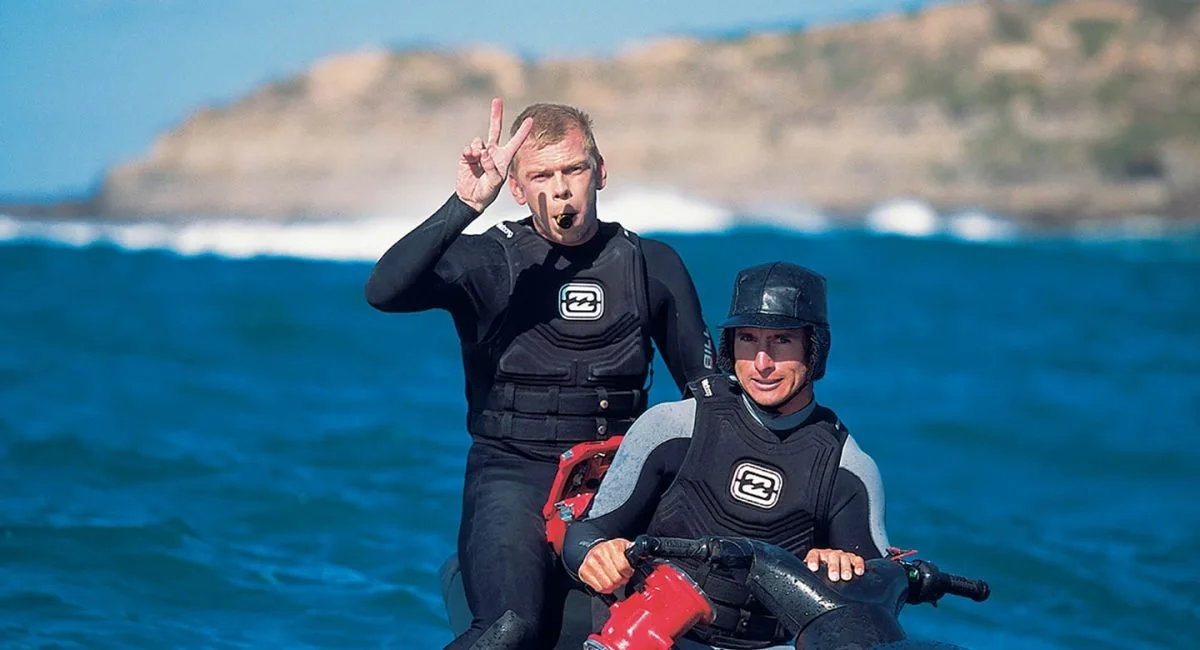
Phil's connection with Aquatech actually began back in the late 1990s when he was using their water housings for his own photography.

Over the years, that relationship developed from being a customer and photographer testing equipment to helping develop products and eventually becoming an integral part of the business.

What I found particularly interesting was hearing how much real-world experience goes into the design of water housings.

It's one thing to design something that works on paper. It's another to have decades of experience swimming around in heavy surf, dealing with camera controls, ports, water pressure and all the little challenges that come with shooting in the ocean.

That knowledge is incredibly valuable when it comes to developing equipment for other photographers.
What's Next for Aquatech?

Towards the end of our conversation, Phil shares some exciting information about where Aquatech is heading.

We get into the development of deeper-rated water housings, some of the thinking behind future products, and what's happening in the world of underwater lighting.

There's some genuinely interesting stuff here for anyone already using Aquatech equipment or considering getting into water photography.

I'll leave the details for you to discover in the interview.
Aquatech Discount Code TOMW: Save 5%

I've been using Aquatech water housings for years in my own surf, underwater and commercial photography.

They're a big part of how I work, and I'm also an Aquatech affiliate.

If you're considering purchasing a housing, lens port or other Aquatech accessories, you can use my discount code TOMW to save 5% on eligible purchases.

Aquatech Australia: https://aquatech.net/

Discount code: TOMW

I've also written a separate article about Aquatech water housings, pricing and how to use my discount code:

Read my Aquatech Water Housing and Discount Code Guide

Affiliate disclosure: I may earn a commission when you purchase through my Aquatech affiliate links or use my code, at no additional cost to you.

More Water Photography Advice From Phil

After we finished the main interview, Phil and I kept chatting about some practical water photography topics.

We've got four separate videos coming covering advice for photographers getting started with water housings, looking after your equipment, choosing between glass and acrylic ports, and techniques for keeping water off your lens.

These will be published over on my Dream Life Photography YouTube channel.

A massive thanks to Phil for taking the time to share his experiences, knowledge and stories.

If you're into photography, the ocean or simply hearing how people have built a life around something they're passionate about, I reckon you'll enjoy this conversation.

Cheers,

Tom
10 Photography Composition Techniques That Will Improve Your Photos


One of the biggest things that can improve your photography has absolutely nothing to do with buying a better camera or lens.

It’s composition.

You can have beautiful light, an incredible subject and technically perfect exposure, but if the elements inside your frame haven’t been considered, the photograph can still feel ordinary.

After more than 20 years working professionally as a photographer, composition is something I think about almost every time I lift a camera to my eye.

The goal isn’t to blindly follow a collection of photography rules. It’s to become aware of the entire frame and make deliberate decisions about why things are positioned where they are.

In this guide I’m going to run through 10 photography composition techniques I use regularly in my own work, from surf and water photography through to landscapes, lifestyle and commercial photography.

I’ll also show why sometimes breaking the rules works perfectly, and why at other times a photograph can fall apart simply because the composition wasn’t considered carefully enough.

Prefer to watch? You can see all of these techniques demonstrated with my own photographs in the full video below.

What is composition in photography?

Photography composition is simply the way the different visual elements are arranged inside your frame.

That includes obvious things such as where you position your main subject, but it also includes the horizon, foreground, background, lines, colour, empty space, patterns, perspective and even the direction somebody is looking or moving.

For me, good composition comes down to intent.

If you deliberately place something in the middle of the frame because that is exactly how you want the photograph to feel, great.

If the subject simply ended up in the middle because you were so focused on them that you forgot to look at everything else around them, that’s a completely different story.

The purpose of learning composition is not to remove creativity. It is to heighten your awareness so that you start making these choices deliberately.

1. Start with the rule of thirds

The rule of thirds is probably the best-known photography composition technique, and for good reason.

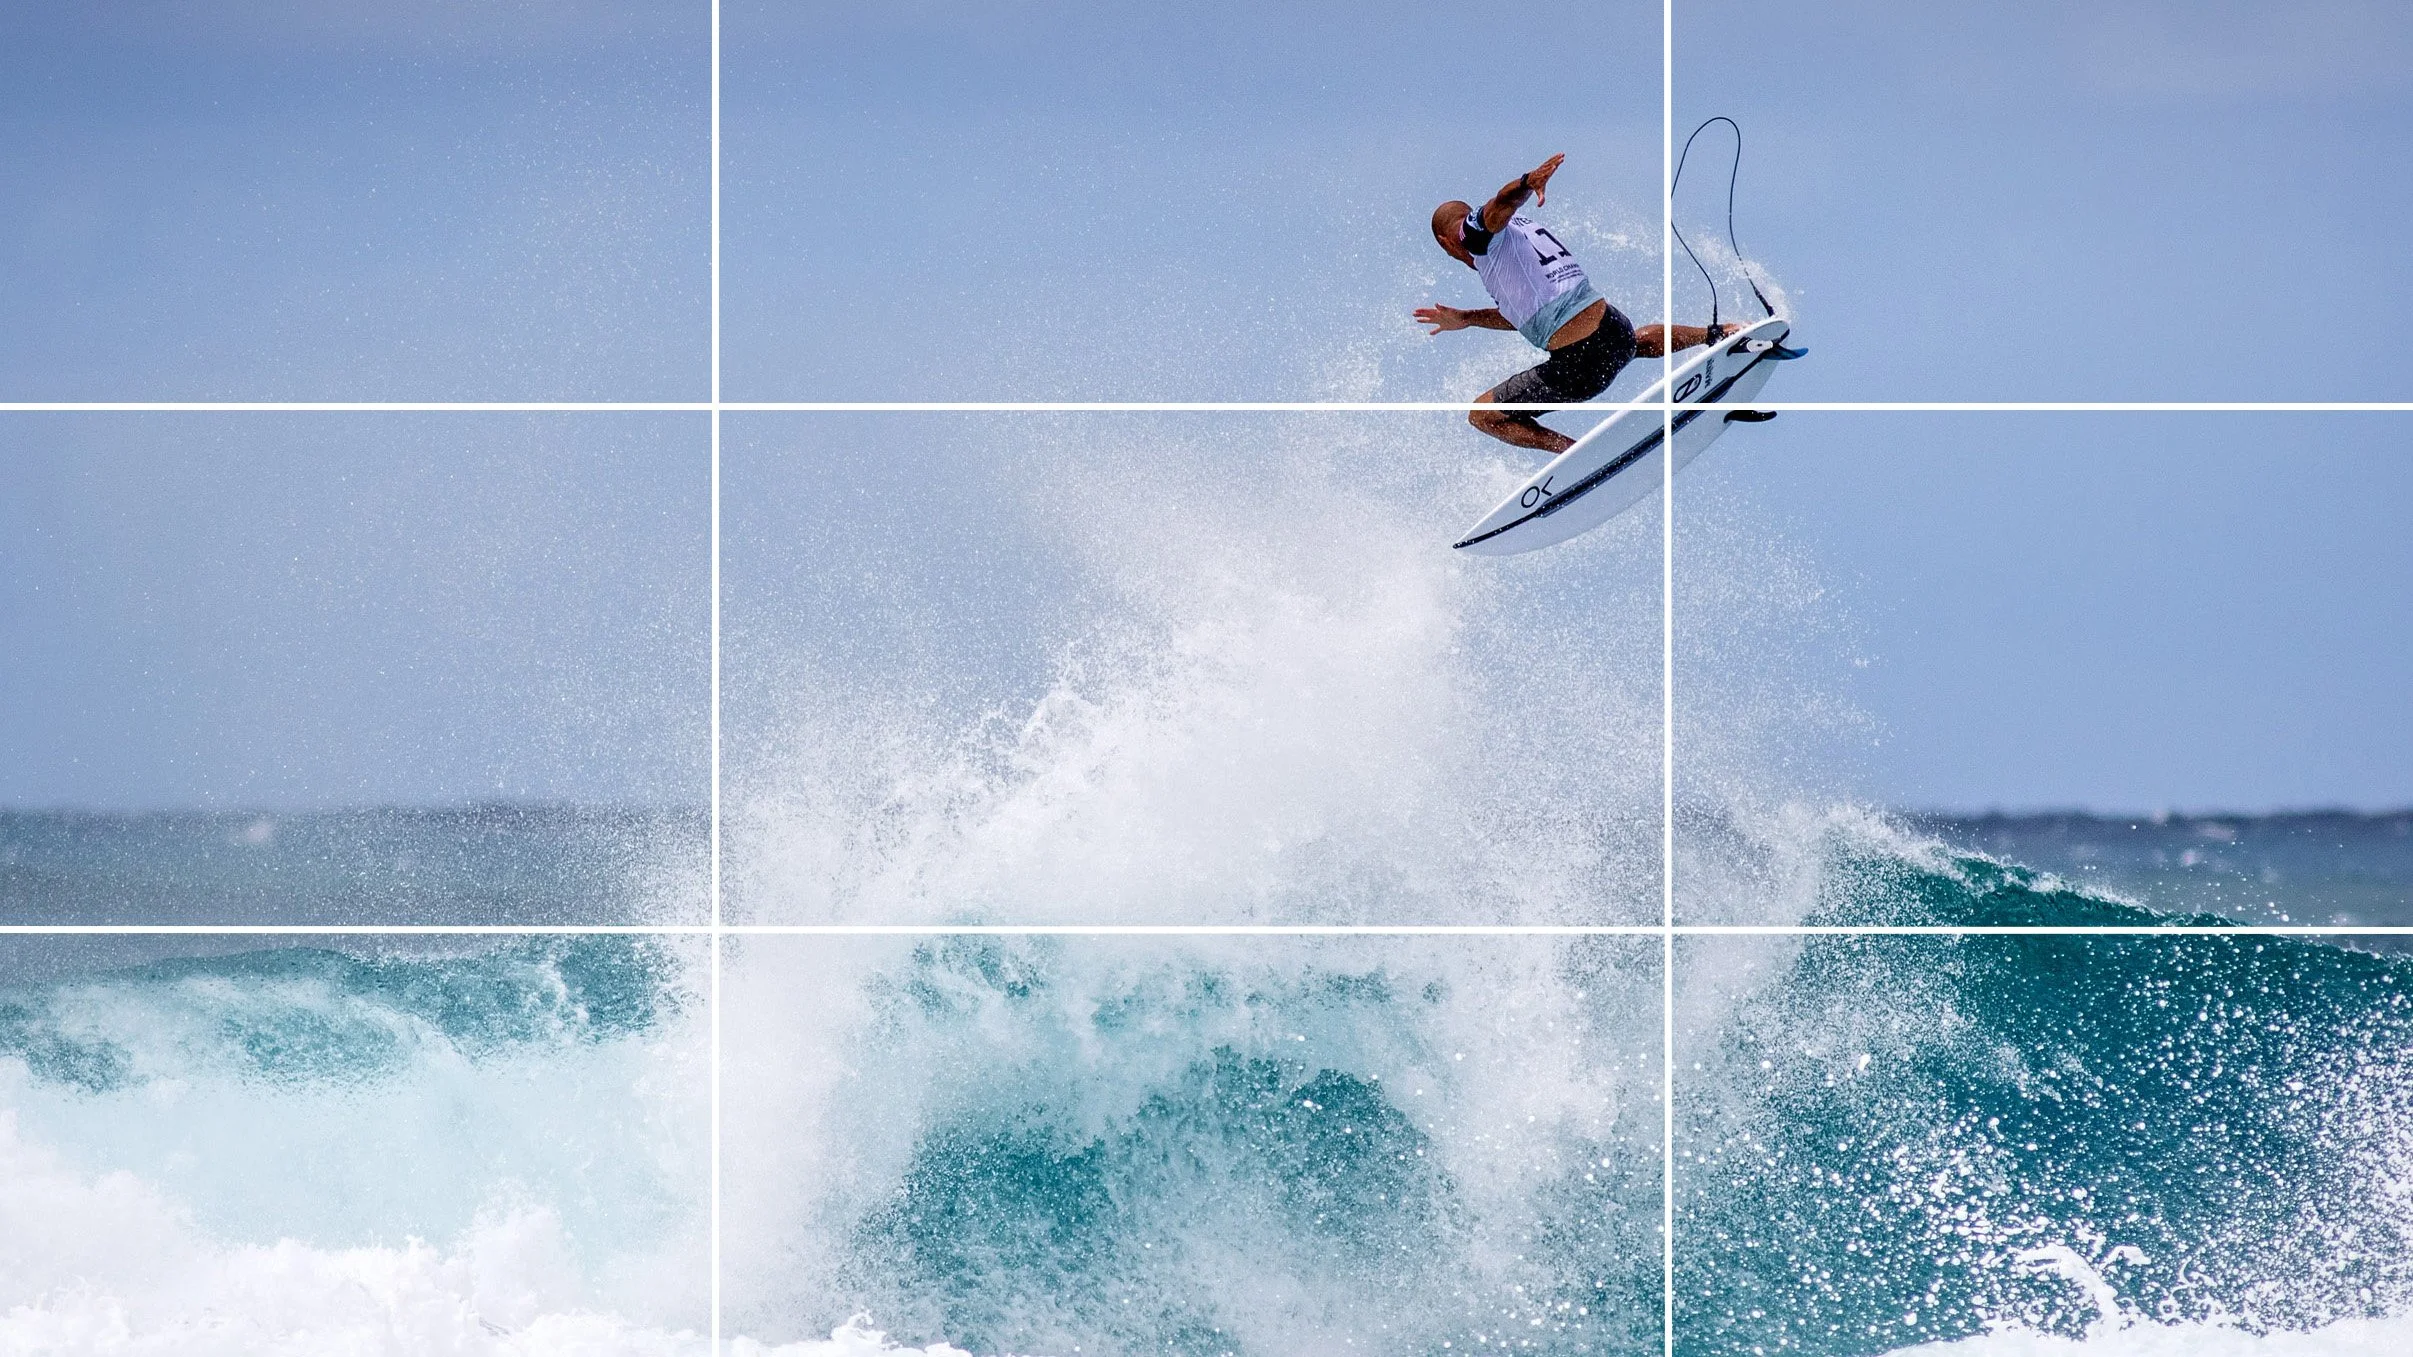
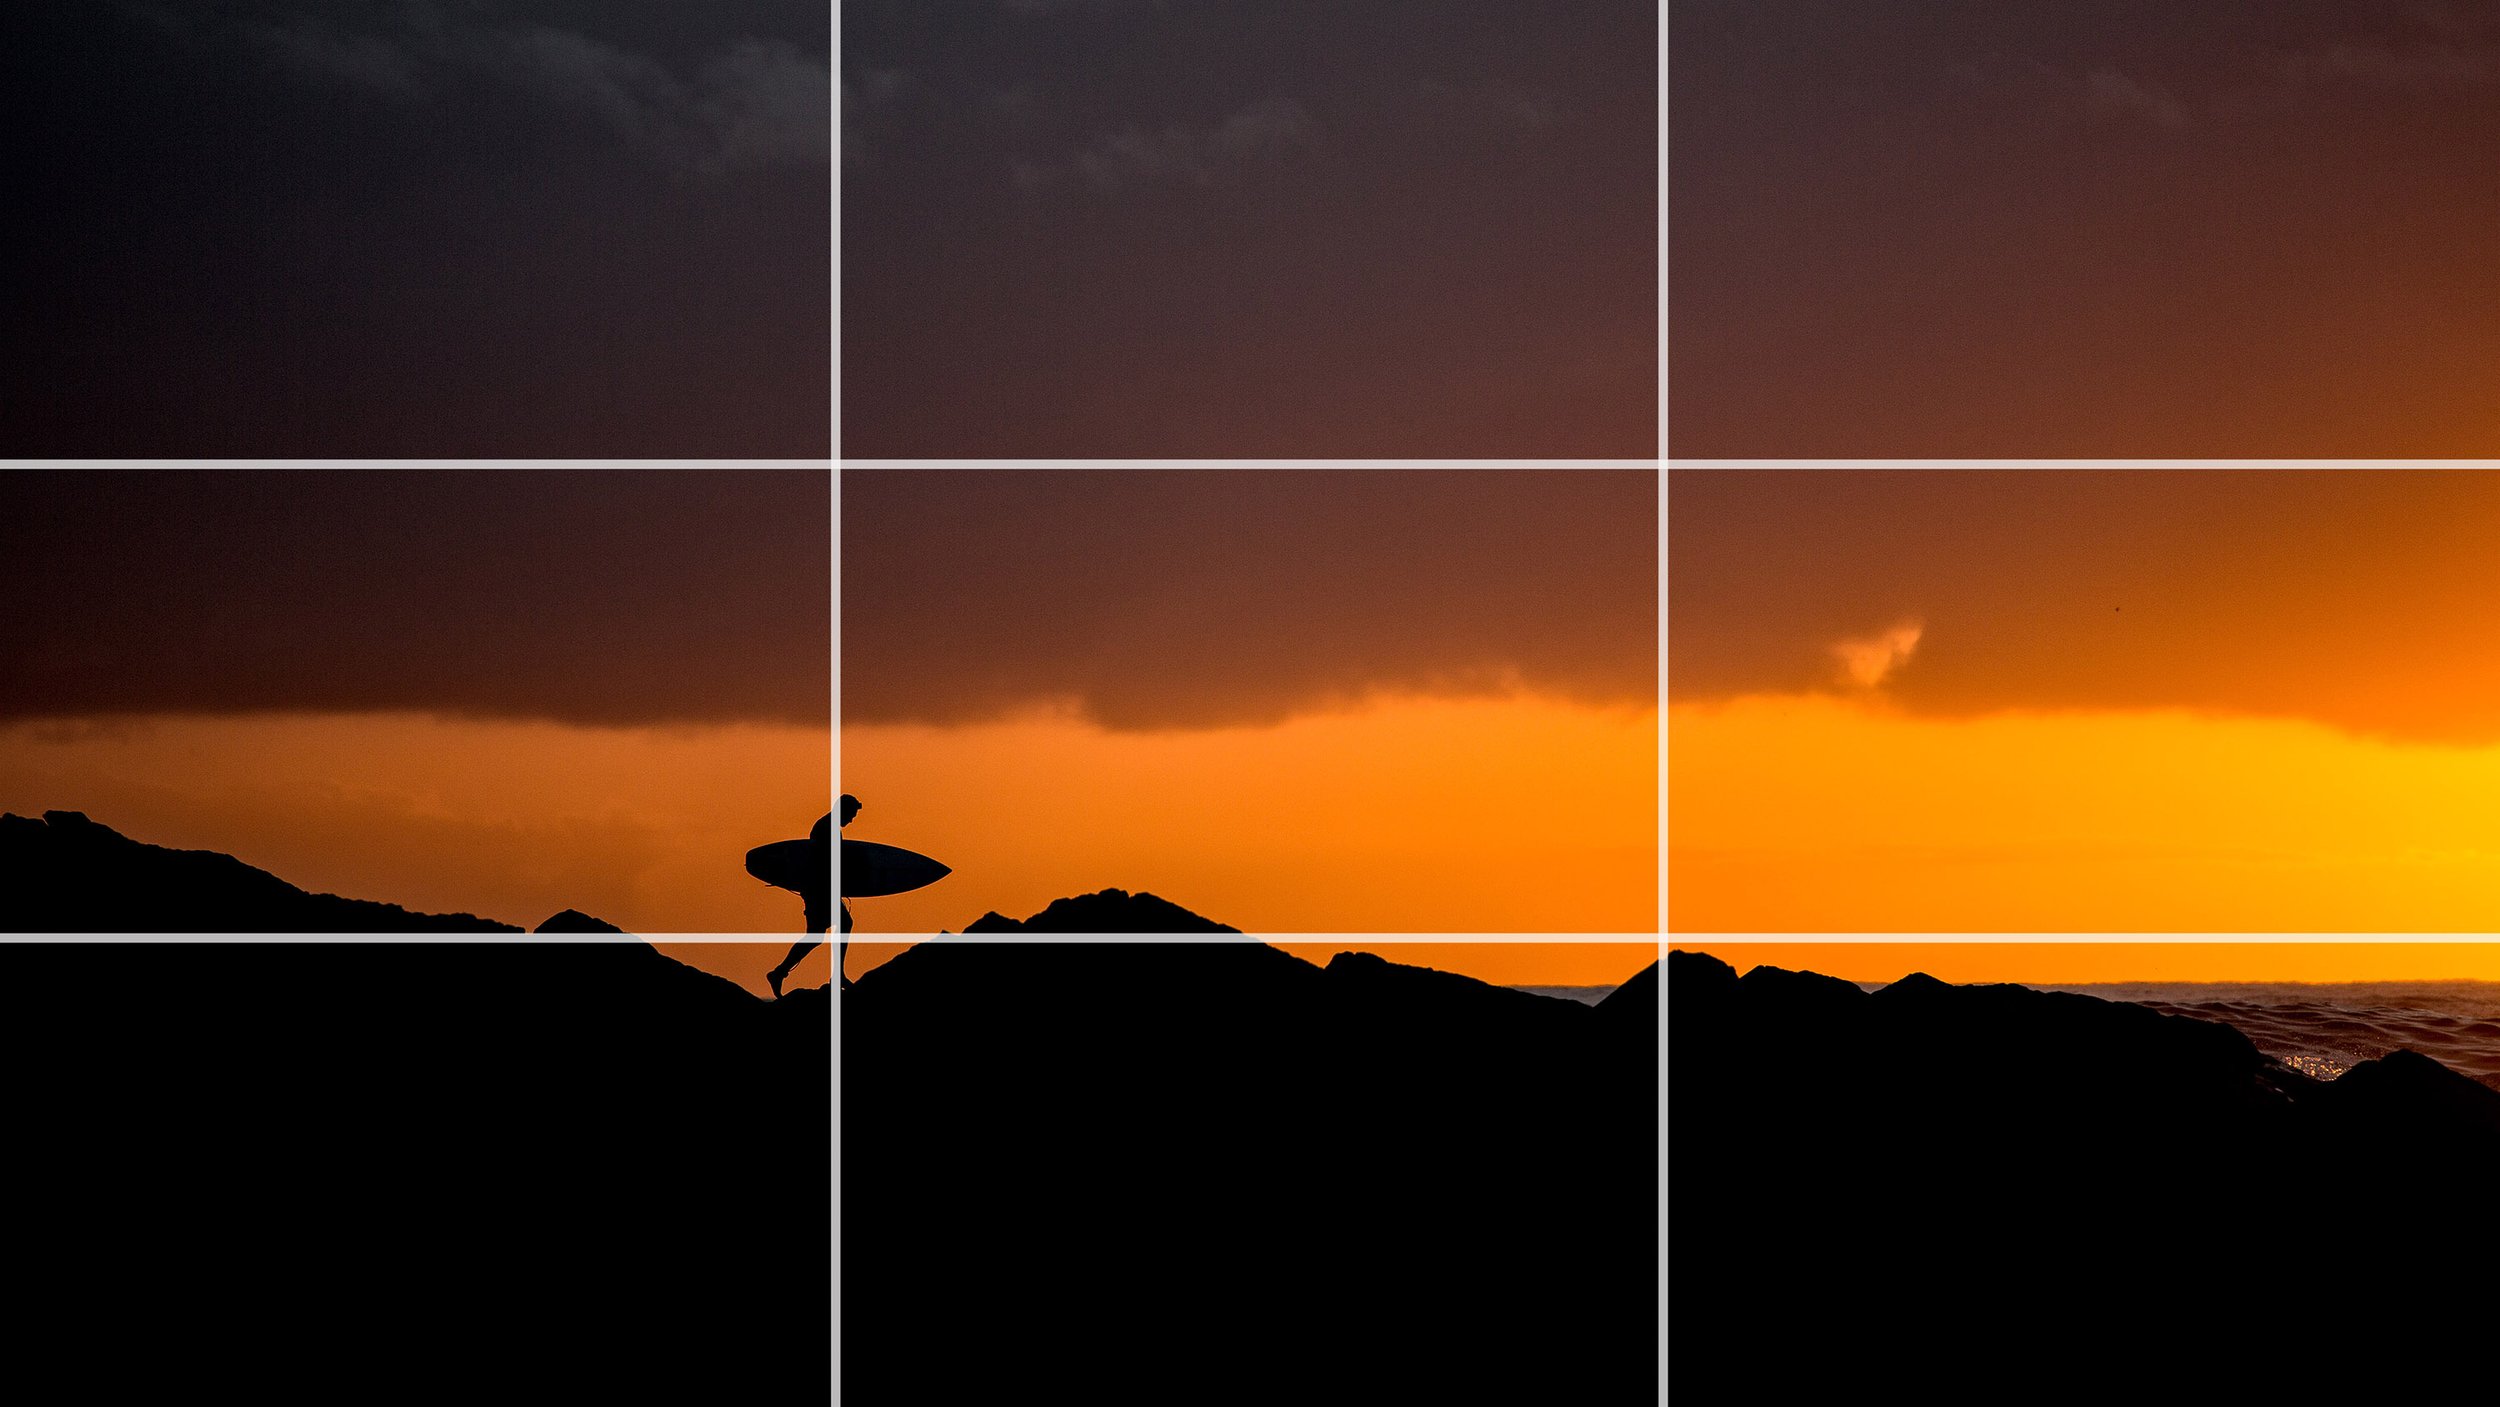
Imagine dividing your photograph into nine equal rectangles using two horizontal and two vertical lines.

Instead of automatically placing your subject dead centre, try positioning the main point of interest along one of those lines or close to one of the four intersections.

I use this regularly in surf photography.

When photographing a surfer, I often position them toward one side of the frame and leave space in front of the direction they are travelling.

That space does more than make the picture look balanced.

It helps tell the story.

The viewer can see where the surfer is going and starts imagining what might happen next.

Compare that with placing the surfer directly in the middle of every frame. Often the photographer is concentrating so heavily on following the surfer that they stop seeing the rest of the composition.

That is something I see regularly in surf photography shot from the land.

Use the rule of thirds for horizons too

The same grid can help enormously with landscapes and seascapes.

First, make sure the horizon is straight.

Then think about whether the horizon belongs near the upper third or lower third rather than automatically putting it straight through the centre.

Which one you choose depends on what is most important.

If you have a spectacular sky, you might give the sky two-thirds of the frame.

If the foreground is the real hero, let that dominate instead.

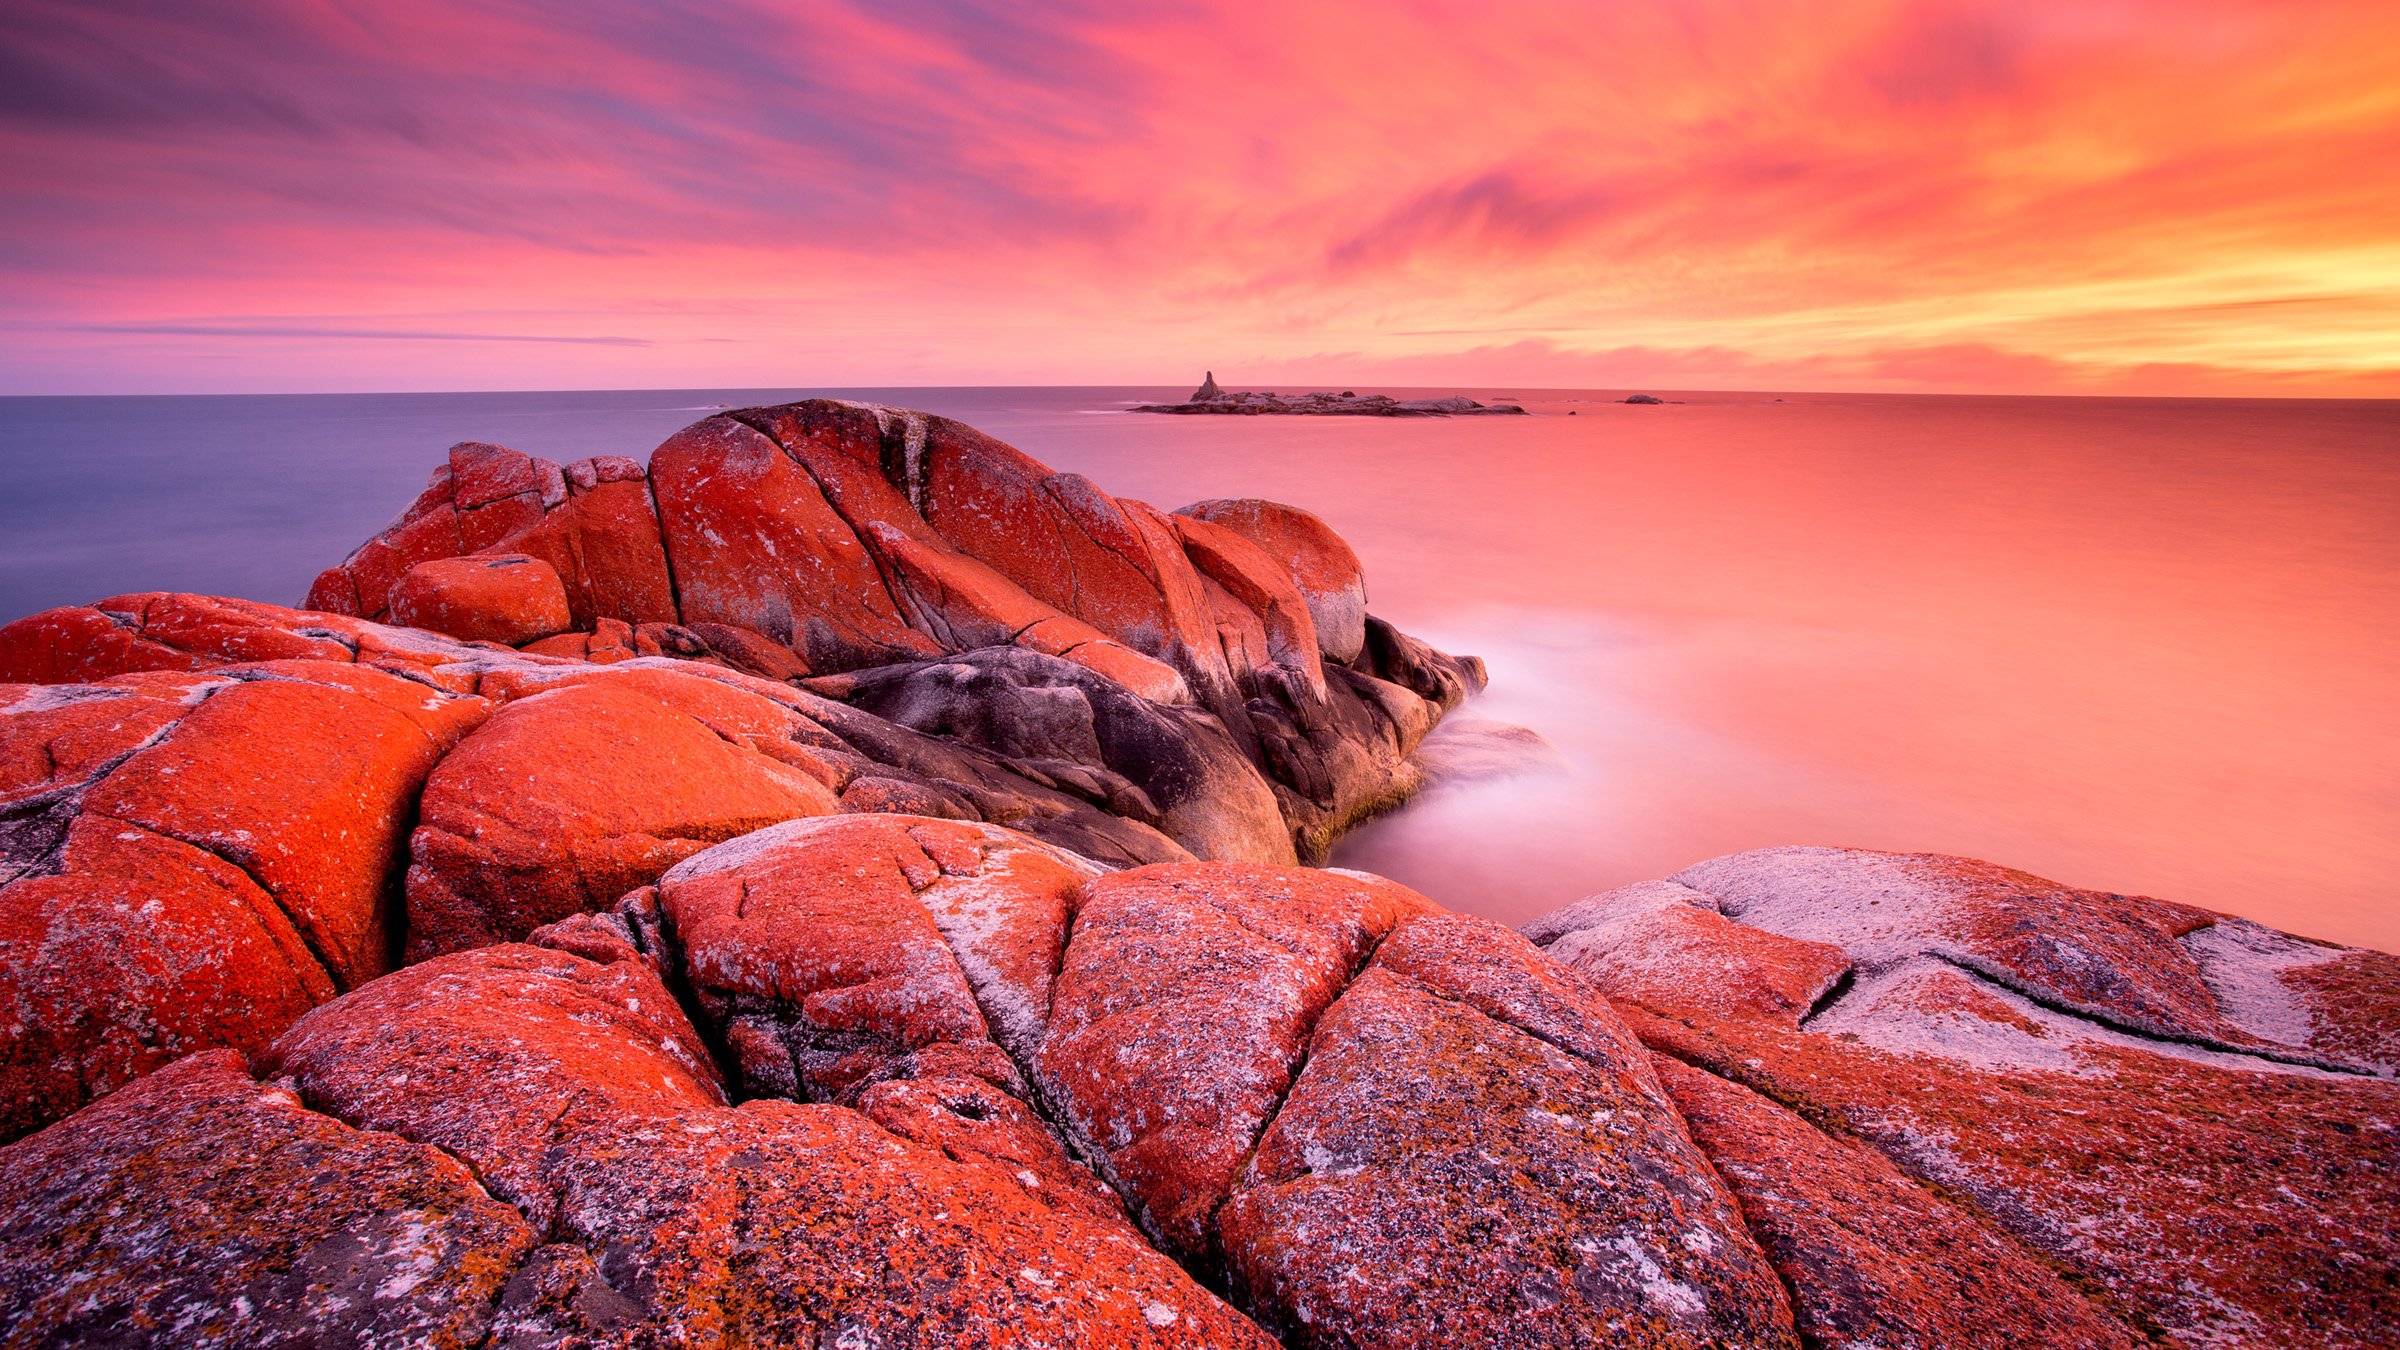
I photographed a landscape at Tasmania’s Bay of Fires where the foreground was covered with beautiful red-orange rocks and incredible texture. The sky was also colourful, but the rocks were the part of the scene I really wanted the viewer to experience.

So I sacrificed much of that beautiful sky and gave more of the frame to the foreground.

That is an important lesson in composition:

You don’t have to include everything that looks good.

Sometimes leaving something out creates a much stronger photograph.


2. Look for foreground interest

Foreground interest is one of the compositional techniques I look for constantly.

Rather than photographing only the main subject, ask yourself whether something closer to the camera can help lead the viewer into the scene.

That could be:

  • a person

  • rocks

  • plants

  • reflections

  • water

  • architecture

  • an out-of-focus object

  • something that naturally frames your subject

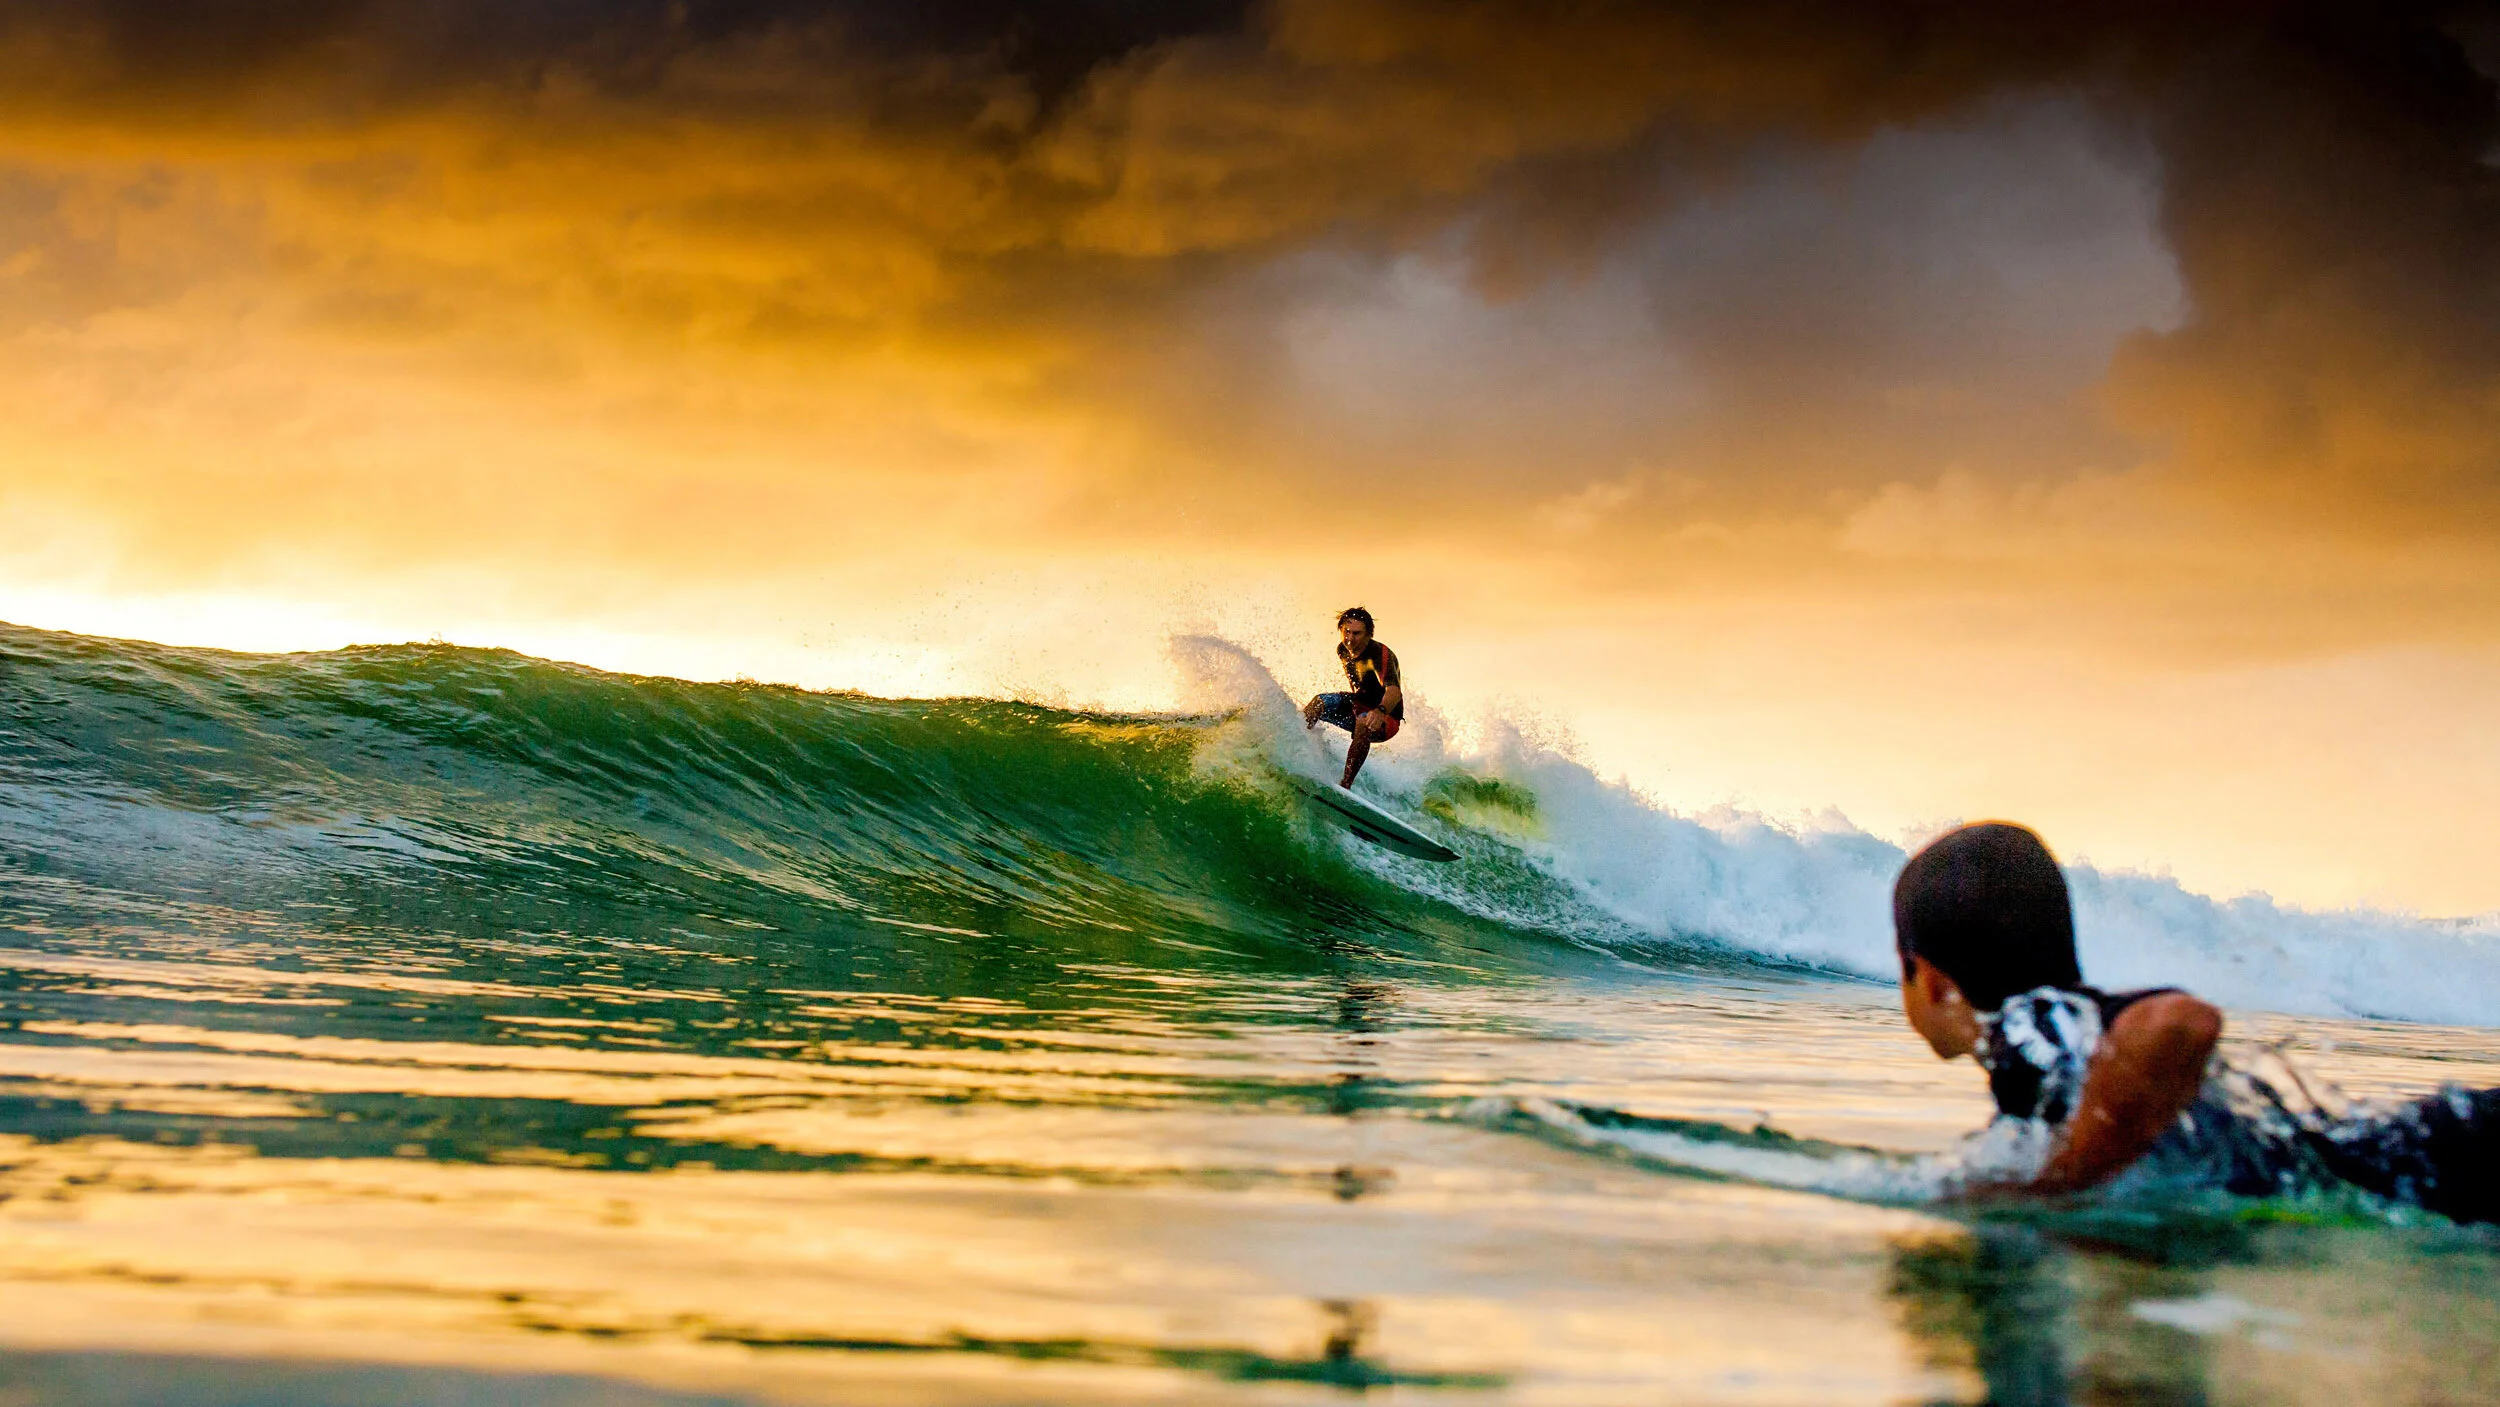
One of my surf images includes an out-of-focus boy paddling in the foreground while his father surfs in the distance.

The father is still the main subject, but the foreground changes the photograph completely.

You now enter the scene from the boy’s perspective and visually travel toward the surfer.

It creates depth, context and story.

Foreground elements can also act as natural framing. A tree, rock, doorway or other object can give an otherwise straightforward photograph another layer.

Whenever I arrive at a location, I’m not only looking at the obvious subject.

I’m looking around it.

3. Use leading lines to guide the viewer

Leading lines are another powerful way to control how somebody experiences your photograph.

A strong line can pull the viewer into the image or guide their eye toward the main subject.

Roads are an obvious example.

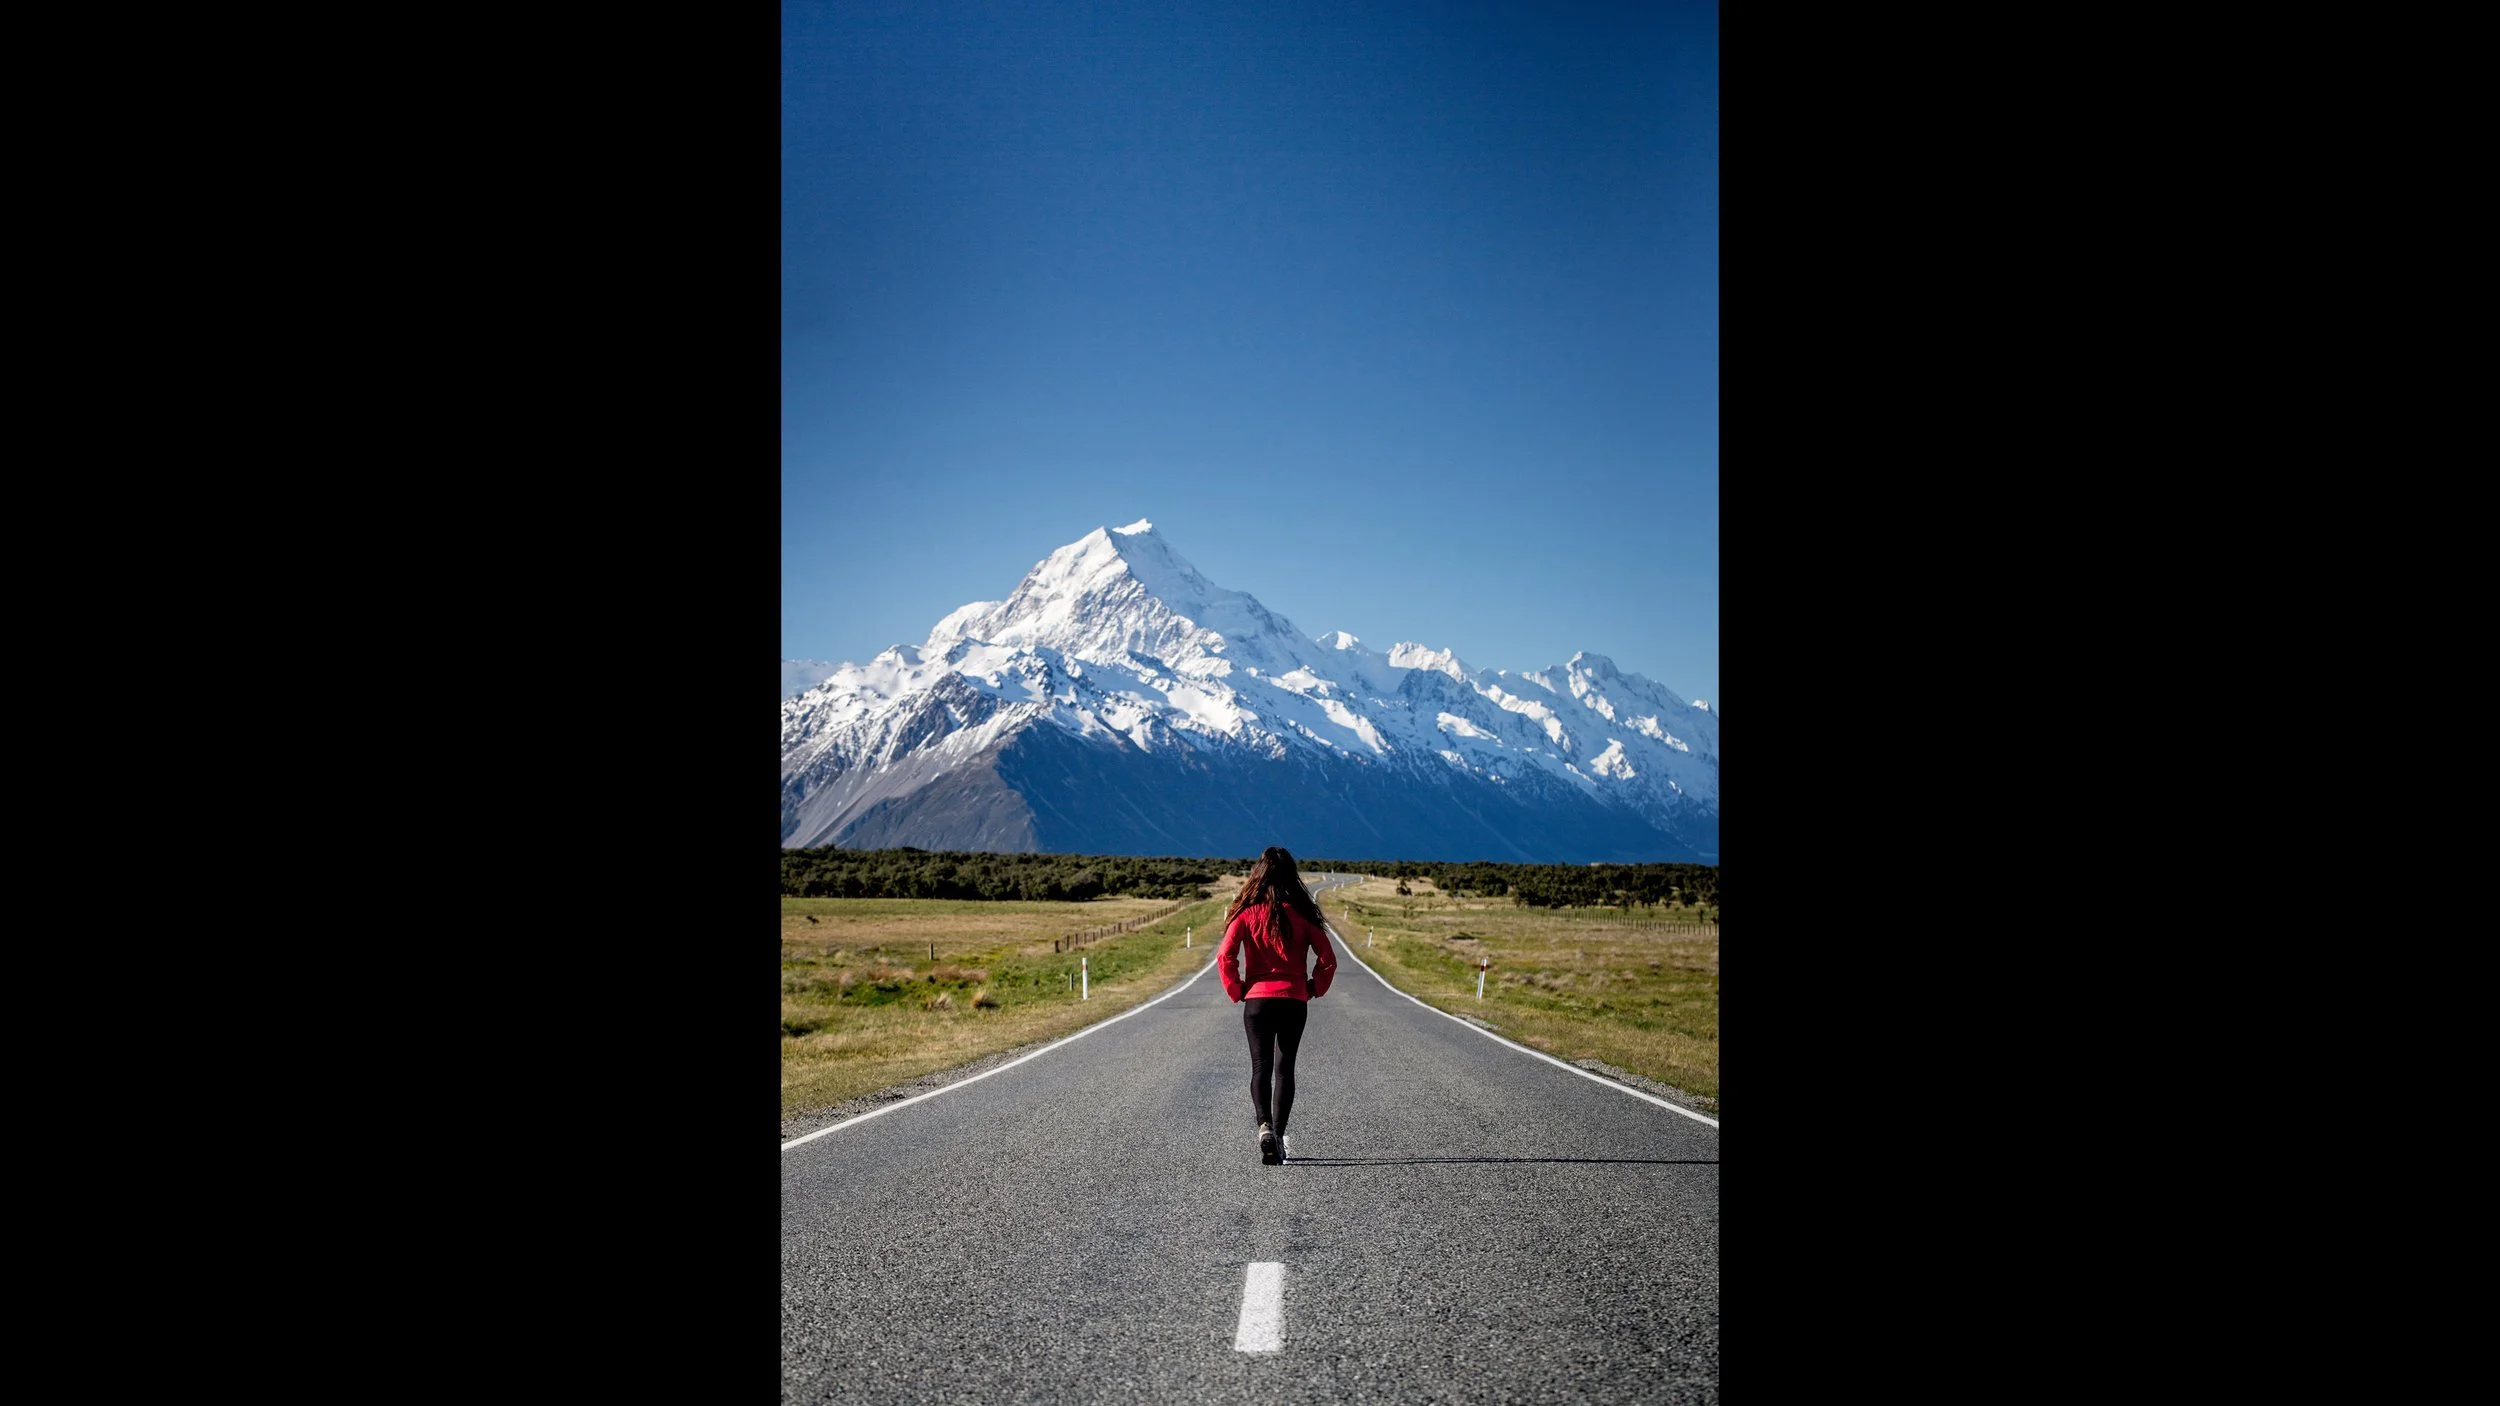
A winding road disappearing toward a mountain range naturally takes your eye on a journey through the photograph.

But leading lines don’t have to be obvious.

They can be:

shorelines, shadows, fences, rock formations, waves, buildings, pathways or even the shape created by several different objects.

They can be straight, curved, symmetrical or quite subtle.

The important thing is becoming aware of them.

Once you start actively looking for leading lines, you begin seeing them in places you previously would have walked straight past.

That awareness is a huge part of becoming a stronger photographer.

4. Look for diagonal lines

Diagonal lines can add movement and energy to a photograph.

A straight horizontal line can feel calm and stable.

Change that line into a diagonal and the frame can suddenly feel more dynamic.

Wide-angle lenses can exaggerate this effect, particularly when you have something strong in the foreground.

You can also create diagonal compositions simply by changing your camera position rather than photographing everything straight on.

This is one of those techniques that can be subtle, but it can make a big difference to how energetic a photograph feels.

5. Use textures and patterns

Texture can be a really useful compositional tool, particularly when different textures contrast against each other.

One of my landscape photographs uses highly detailed rocks in the foreground against soft clouds created with a longer exposure.

The sharp, textured foreground gives the viewer something to visually latch onto.

From there the eye travels upward into the softer colours and clouds.

That contrast between sharp and soft becomes part of the composition.

Patterns can work in a similar way.

Repeated natural patterns, architectural shapes, rows of objects or recurring textures can create rhythm and structure inside the frame.

Often several composition techniques will work together.

The textured landscape example also uses the rule of thirds, with the stronger foreground occupying roughly two-thirds of the photograph.

You don’t have to choose one composition technique per photo.

Eventually they start working together instinctively.

6. Use negative space

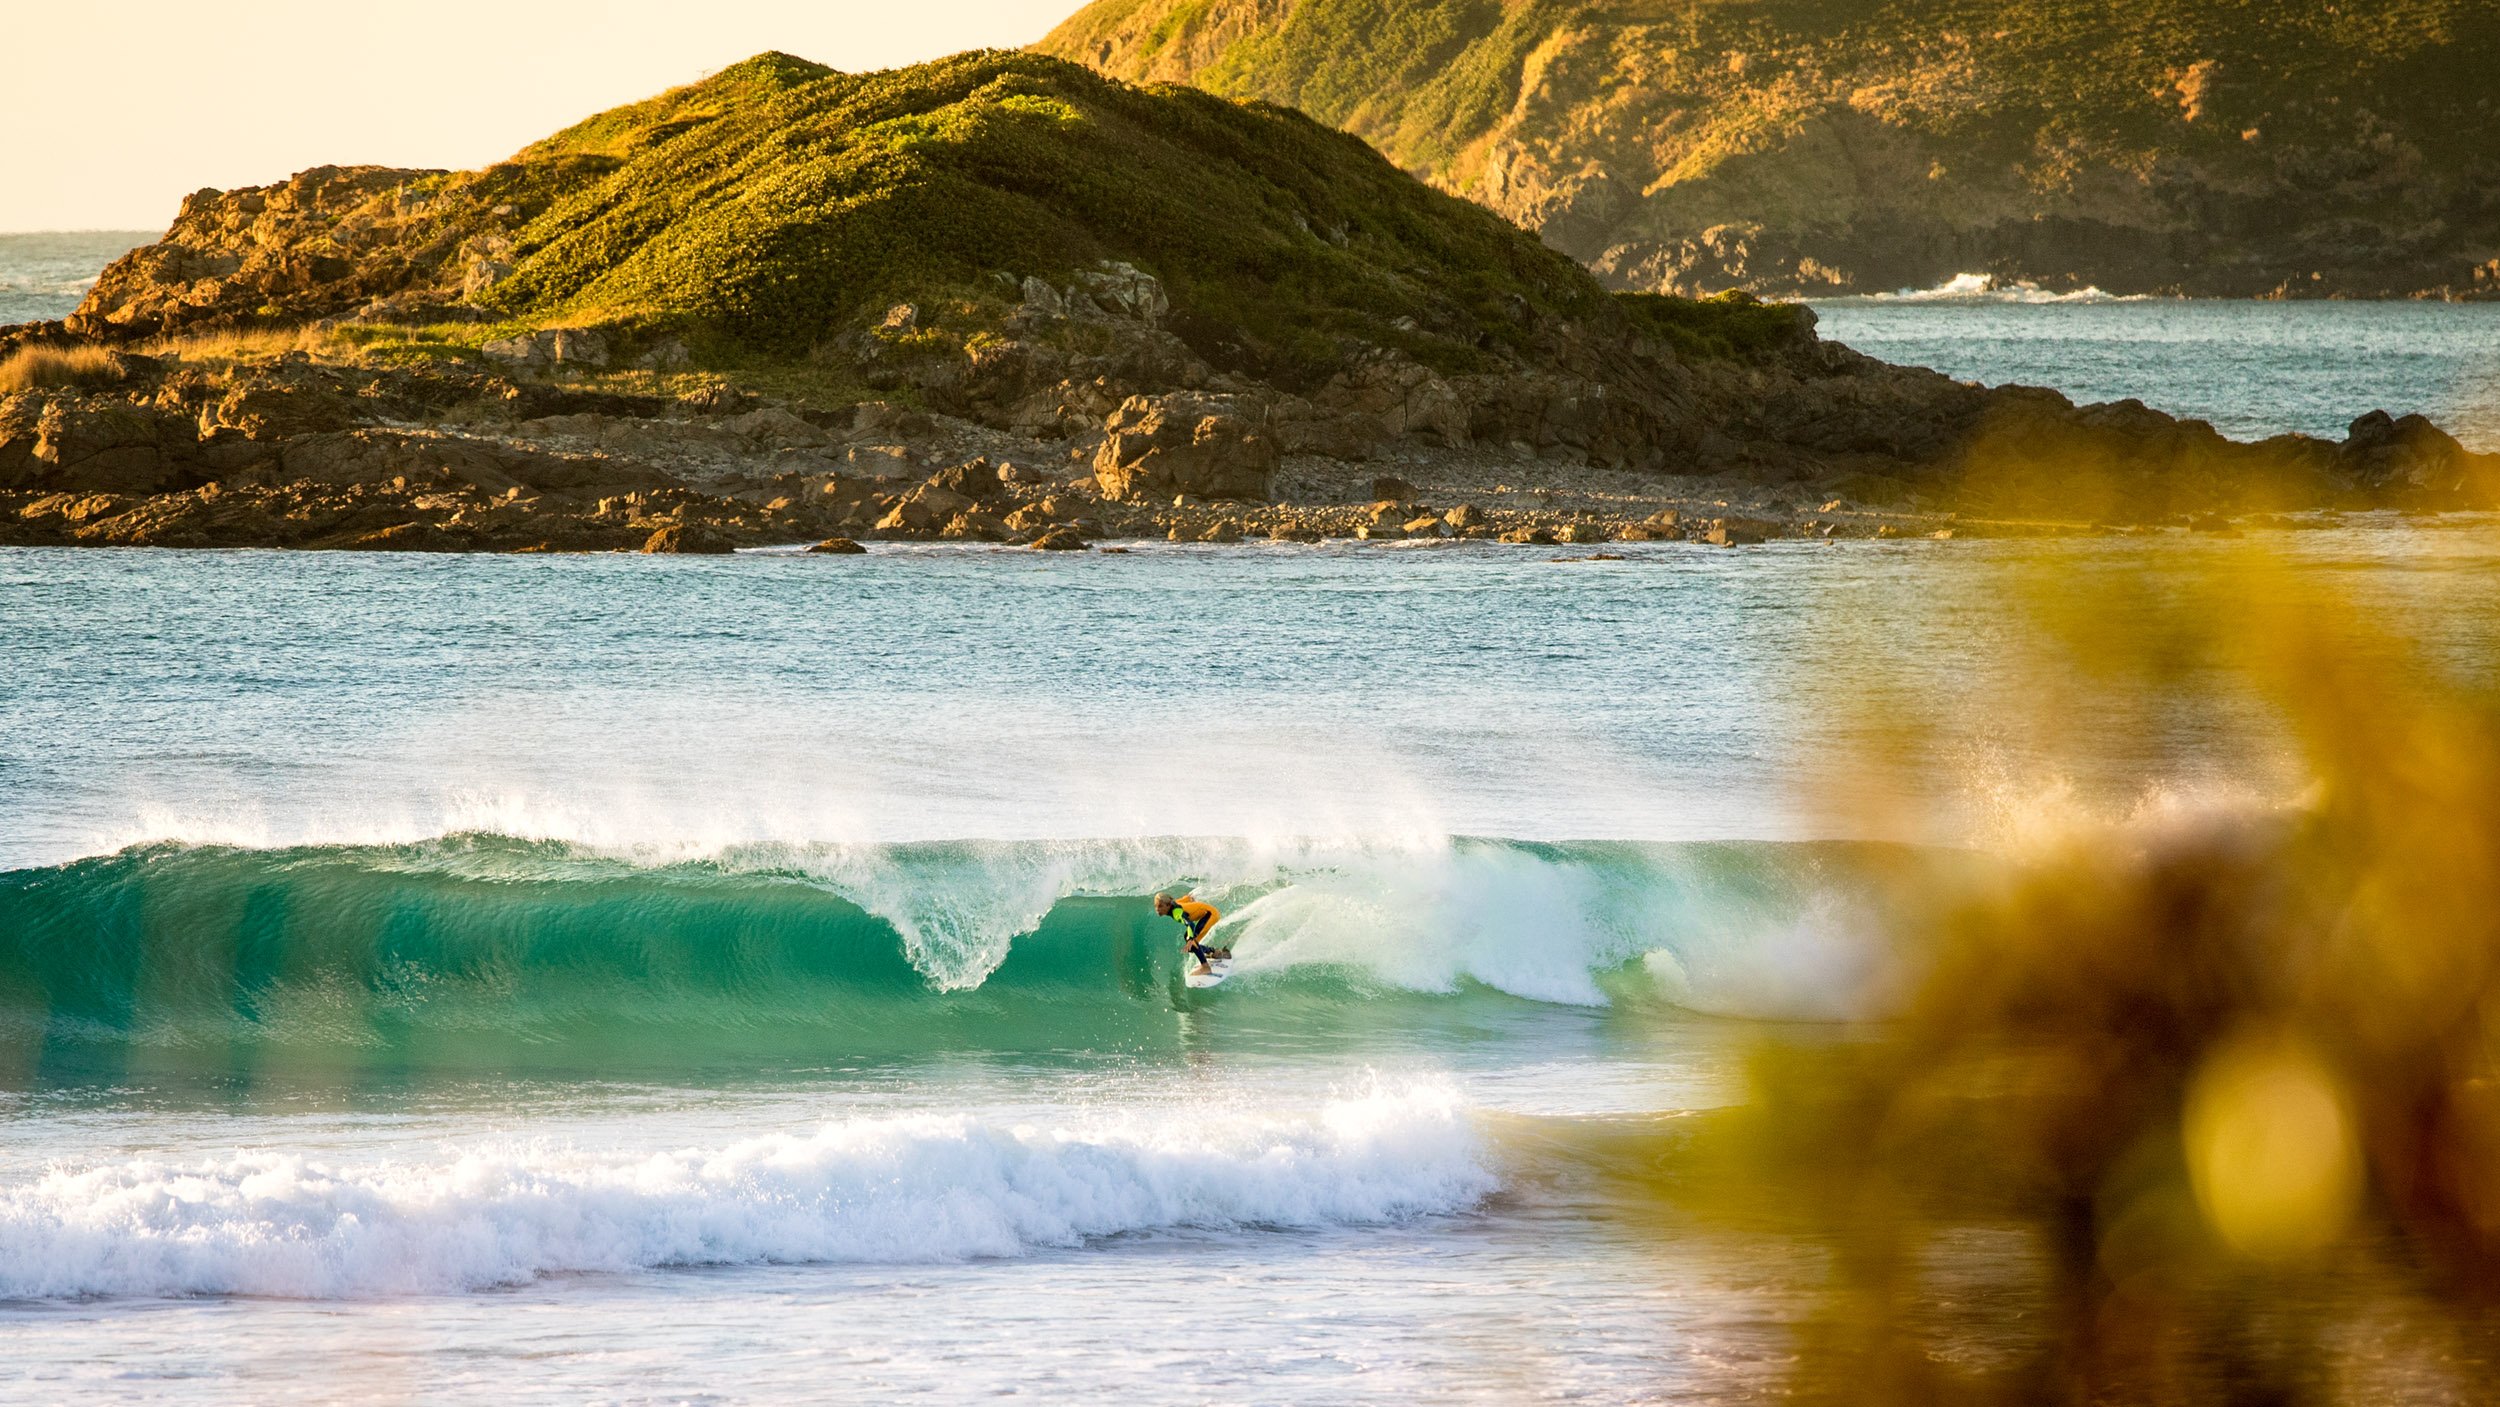
Negative space is one of my favourite compositional techniques, particularly for ocean and surf photography.

Negative space is simply an area of the photograph where there isn’t much happening.

That might be:

an open sky, calm water, a dark background or another relatively clean area surrounding the subject.

Our instinct is often to crop tightly and remove anything that isn’t important.

Most of the time that makes sense.

But sometimes deliberately leaving a lot of empty space around a small subject makes the photograph considerably stronger.

It can show scale.

It can create isolation.

It can give the image a calm or minimal feeling.

And it can make a relatively small subject incredibly powerful.

This is especially useful in ocean photography where a surfer might occupy only a tiny part of a huge expanse of water or sky.

Negative space is also useful commercially.

Magazine and book designers often love photographs with clean areas because they can place headlines or other text over them without covering the main subject.

So negative space can improve a photograph aesthetically while also making the image more useful to a client.

You can even create a similar effect with aperture.

A shallow depth of field can turn a distracting background into a soft, relatively simple area that allows the subject to stand out much more clearly.

7. Change your viewpoint

This is one of the easiest composition techniques to understand and one of the most commonly ignored.

Stop photographing everything from normal standing eye level.

Move.

Get lower.

Get higher.

Move left.

Move right.

Walk closer.

Step further away.

When I used to photograph weddings, I regularly ended up lying belly-down on the ground, sometimes in mud or a shallow puddle, because dropping the camera those few extra inches created a better photograph.

I’d occasionally arrive at the reception filthy.

I didn’t particularly care.

Getting the photograph mattered more.

Most photographs in the world are taken from roughly human eye height because that is where people naturally hold a camera or phone.

That doesn’t make eye level wrong.

It simply means we’ve seen that perspective countless times.

Change your camera height and suddenly an ordinary scene can look very different.

Viewpoint is particularly powerful in surf photography

Water photography naturally gives you an unusual viewpoint because your camera is sitting close to the surface.

That low perspective can create beautiful blurred foregrounds and make small waves feel much larger.

But even in the water I try not to become locked into one camera height.

Sometimes raising the housing higher gives an entirely different feeling.

The same applies when shooting from land.

I’ve photographed small surf days where a standard eye-level image looked fairly ordinary.

Dropping down low and including foreground interest suddenly gave the scene much more depth and character.

Drone photography is another great example.

When high-quality drones first became widely available, those close top-down photographs felt incredible because most people had simply never seen that perspective before.

Now we see aerial photographs constantly.

They can still look amazing, but they aren’t as unusual as they once were.

That’s the lesson.

Look for viewpoints people aren’t accustomed to seeing.

8. Use colour contrast

I love colour and I’m always looking for colour contrast in my photography.

Colour itself can become part of your composition.

A red surfboard against a green wave can immediately grab your attention.

A yellow board against an electric blue ocean works for the same reason.

Warm artificial lights against a deep blue evening sky can create a completely different kind of contrast.

If I’m photographing someone beside a blue lake, putting them in a red jacket can make them stand out immediately.

You don’t always have control over the colours in front of you, particularly when documenting real situations.

But when you do have control, colour can be something you consciously arrange rather than simply accept.

9. Sometimes put the subject bang in the middle

This might sound strange after spending so much time talking about the rule of thirds.

But sometimes the middle is exactly where your subject belongs.

A strong centred composition can work beautifully when the scene has symmetry or when the central placement feels deliberate.

The important word again is intent.

If somebody is centred, I generally want that position to feel very deliberate.

They might be facing directly toward the camera, facing directly away, or sitting perfectly within a symmetrical scene.

A centred composition can make a very strong visual statement.

I just wouldn’t use it for every photograph.

Its impact often comes from the fact that it feels bold and deliberate.

Learn the rule of thirds, understand why it works, and then know when you want to ignore it.

10. Keep the viewer’s attention inside the frame

This is something I think about constantly when photographing people and action.

If you leave space on one side of the subject, think about where their body, eyes or movement are directing the viewer.

Generally I like the subject to be looking or moving into the open space.

For example, if a surfer is positioned on the left side of the photograph and travelling toward the right, leaving space to the right gives them somewhere to go visually.

Your eye goes to the surfer and then follows their movement deeper into the photograph.

The same idea can apply to somebody simply looking in a particular direction.

If they are right against the edge of the photograph and looking out of the frame, your viewer has effectively been shown the exit.

You usually want to keep them looking around the photograph for as long as possible.

There are exceptions.

I photographed Kelly Slater performing a manoeuvre where showing more of the wave behind him actually created the stronger composition because the direction of his body and movement turned back into the open part of the frame.

That’s why composition isn’t a mathematical formula.

You need to look at what is actually happening inside your particular frame.

Kelly Slater Aerial Surfing - Photography Composition

A composition I got wrong

I think it’s important to show examples where things didn’t work too.

I have an image of a surfer where I failed to create the composition I wanted.

I placed her almost dead centre, but she wasn’t coming directly toward me.

She was looking toward the right side of the frame.

Because of that, the centred composition felt awkward.

Had I placed her further toward the left, the direction she was looking would have carried the viewer into the open space on the right.

I also had too much unneeded water in the foreground and not enough of the beautiful pink sunset sky above her.

A higher camera angle would have solved several problems at once.

It would have reduced the unnecessary foreground.

It would have included more of the sky.

And it would have moved the horizon away from the middle of the photograph.

I later tried improving the image with a crop, and it helped, but the frame became too crowded.

That’s another useful lesson.

Cropping can improve composition, but getting it right in-camera is better

Lightroom and Photoshop give us plenty of freedom to crop after the fact.

I use that when necessary.

But I consider post-production cropping a second chance rather than the goal.

Ideally I want to recognise the composition when I’m actually taking the photograph.

That gives me more resolution to work with and, more importantly, forces me to become a better photographer rather than assuming I can fix everything later.

How do you improve your photography composition?

Don’t try to remember all 10 techniques every time you take a picture.

That will probably make photography less enjoyable rather than more.

Pick one.

On your next shoot, perhaps concentrate only on the rule of thirds.

On the following shoot, look for foreground interest.

Next time, deliberately change your viewpoint.

Then start noticing leading lines.

As you practise these things, they stop feeling like rules you need to remember.

They start becoming instinct.

I still learn and refine my composition constantly.

That’s part of photography.

The important thing is that you are now thinking about it.

If you composed a photograph in a certain way because that is genuinely how you wanted it to look, then you’ve made a creative decision.

If you never considered composition at all, you’re leaving one of the most important parts of photography to chance.

Composition should support your creative vision, not control it

I’ve deliberately used the word “rules” cautiously throughout this article.

Photography is creative.

There isn’t one correct position for a surfer, one correct horizon, one correct amount of negative space or one correct place to stand.

These composition techniques are tools.

Learn them.

Practise them.

Understand why they work.

Then break them when you have a good reason.

The end goal is not to photograph according to a checklist.

It’s to reach the point where you lift the camera, look through the viewfinder and instinctively start arranging the frame with purpose.

That’s when composition becomes part of your photography rather than something you have to consciously remember.

Watch the full photography composition tutorial

In the video version of this article I walk through these techniques using my own photographs, including surf photography, landscapes and examples where several compositional ideas are working together.

Watch: 10 Composition Techniques That Will Improve Your Photography

[WATCH ON YOUTUBE VIDEO HERE]

About Tom Woods

Tom Woods is the photographer behind ST Images and has worked professionally in photography for more than 20 years.

His work spans tourism and accommodation photography, outdoor lifestyle and commercial campaigns, surf and water photography, landscapes and editorial assignments.

A large part of Tom’s approach is built around creating photographs that don’t simply document what something looks like, but communicate what it feels like to be there.

You can explore more photography tutorials and behind-the-scenes education on the Dream Life Photography YouTube channel, or view Tom’s commercial photography work more on this website www.stimages.com.au

Airbnb Photography on the Sunshine Coast

From Caloundra to Noosa, plus the Hinterland and Gympie Region

If you’ve got an Airbnb or short-stay property on the Sunshine Coast, you already know the truth. You’re not just competing with the place down the road. You’re competing with every stunning listing someone can scroll to in three seconds.

That’s why great photos are not a “nice to have”. They are the difference between “looks alright” and “booked”.

At ST Images, we create clean, inviting, high-end photo libraries for Airbnbs, holiday homes, and short-term rentals. The goal is simple: help your listing stand out, build trust fast, and turn browsers into bookings.

Why Airbnb photos matter more than ever

Most guests make a decision based on photos first, then they read the details. If your images are dark, inconsistent, or missing key spaces, people keep scrolling.

Professional Airbnb photography helps you:

  • Attract more clicks (your thumbnail matters)

  • Increase trust (guests feel confident booking)

  • Showcase the layout and flow (important for groups and families)

  • Highlight the “why this place” features (views, pool, outdoor area, styling details)

  • Build a reusable content library for your website and socials

What we capture on an Airbnb shoot

Every property is different, but most successful shoots include:

  • Bright, well-composed interior images (living, kitchen, bedrooms, bathrooms)

  • Wide shots that show the space, plus detail shots that sell the vibe

  • Exterior hero images (front of property, views, pool, yard)

  • Outdoor lifestyle areas (deck, BBQ, firepit, dining zones)

  • Key amenities guests care about (workspace, coffee setup, laundry, kids areas)

  • Optional add-ons: twilight images, drone, short walkthrough video (where suitable)

The style is natural, true-to-life, and welcoming. No weird filters, no “looks nothing like the place” editing. Just strong, clean images that make people want to stay.

Areas we shoot: Sunshine Coast, Noosa, Hinterland, and Gympie

We’re based on the Sunshine Coast and regularly shoot across the full region, including:

Noosa and surrounds

  • Noosa Heads

  • Doonan

  • Peregian Beach

  • Coolum Beach

  • Cooroy

  • Cooran

Noosa listings usually win on lifestyle. Natural light, outdoor living, and that relaxed coastal feel. We’ll make sure the hero features are obvious in the first few images, because that’s where bookings are won.

Sunshine Coast beaches and central hubs

  • Mudjimba

  • Maroochydore

  • Mooloolaba

  • Caloundra

These areas are high-competition, which is good news if you show up professionally. Crisp images with great angles, correct colour, and a consistent set makes a listing feel established and trustworthy.

Hinterland charm and unique stays

  • Eumundi

  • Cooroy and surrounds

  • Cooran and hinterland pockets

Hinterland properties shine when the shoot captures warmth, character, and the little details guests remember. Think decks, views, gardens, texture, and atmosphere.

Gympie region and further north

  • Gympie and surrounding areas

More and more travellers are looking for space, privacy, and something different. If your property offers that, your photos should do the heavy lifting to communicate it instantly.

If you’re slightly outside these suburbs, still reach out. If it’s a good fit, we’re happy to travel.

A simple approach that keeps shoots smooth

Owners and hosts are busy. Our process is designed to be easy:

  1. You book a shoot date that suits guest changeover

  2. We share a simple prep checklist (what matters, what does not)

  3. We shoot efficiently and thoughtfully, focusing on the rooms and features that sell

  4. You receive a polished image library ready for Airbnb, Stayz, Booking.com, your website, and socials

If you manage multiple properties, we can also help you build consistency across all listings so your brand looks dialled in.

Tips to get the most from your Airbnb shoot

A few quick wins that make a big difference:

  • Replace blown bulbs and match colour temperature where possible

  • Clear bench clutter but keep a few styled hero items

  • Make beds hotel-neat (tight corners, smooth covers)

  • Hide spare cords, remotes, and random packaging

  • If you have a standout feature (view, pool, outdoor bath), tell us early so we prioritise it

You do not need to create a showroom. You just need the place to feel fresh, calm, and guest-ready.

Recent Sunshine Coast Airbnb shoots

If you want to see what this looks like in the real world, here are a couple of Sunshine Coast Airbnb photo shoots. These galleries show the style, the angles, and the overall feel we aim for in every listing.

Unit-style Airbnb photography (Sunshine Coast)

Apartments and unit-style stays need photos that make the space feel open, clean, and easy to understand at a glance. We focus on strong wide shots, clean lines, natural light, and a consistent look across the whole set so guests can picture themselves there straight away.

View the unit-style Airbnb gallery here:
https://www.stimages.com.au/commercial-shoots#/sunshine-coast-air-bnb-photography/

House-style Airbnb photography (coming soon)

Standalone homes are where we can really lean into flow and lifestyle. Think hero exterior shots, outdoor living areas, and a full story of the property from arrival to “yep, we could stay here”.

House-style Airbnb gallery coming soon (I’ll link it here as soon as it’s live).

If you manage multiple properties, this is also where consistent photography pays off. When all your listings look cohesive, it builds trust fast and makes your brand feel premium straight away.

Want your listing to look like the best option in your area?

If you’re ready to upgrade your Airbnb photography, get in touch and tell us:

  • Your suburb

  • Property type (apartment, holiday house, hinterland stay, etc.)

  • How many bedrooms

  • Any hero features you want to highlight (view, pool, designer fitout, pet friendly, spa, firepit)

We’ll recommend the best shoot approach and help you build an image library that gets attention and drives bookings.

Enquire here to book your Airbnb shoot:

Why Every Photographer Should Have a Crack at Water Photography

And how you can save on the best gear with my Aquatech discount code (TOMW)

Let’s be honest—if you’re a photographer looking to stand out and land better gigs, it’s time to stop playing it safe on land.

Getting in the water with a camera opens up a whole new world of creative shots most other shooters just can’t offer. And that’s exactly why it’s been one of the best things I ever added to my kit.

I’ve been shooting with a water housing for over 25 years—first getting my work into surf mags, and now creating visual campaigns for resorts, tourism boards, adventure brands and beyond. And I can tell you without a doubt:
Water photography has helped me win jobs, grow my reputation, and produce some of my most memorable work.

Why Water Photography Gives You the Upper Hand

Most photographers are landlocked—and that’s where you’ve got the edge.

Whether you’re swimming in the surf, shooting in a river, bobbing in a lagoon or getting half-above/half-below shots (those sweet split-level ones), having the gear—and the skills—to shoot in water sets you apart.

It helps clients tell more dynamic stories. It helps their brand stand out. And frankly, it helps you get the job over someone else.

From resort pools to ocean wildlife, water shots hit differently—and clients know it.

I’ve had heaps of tourism and lifestyle brands come to me purely because they want those water shots. It gives their campaigns something fresh, immersive, and authentic.

The Water Housing I’ve Trusted for Over 20 Years

There’s one brand I’ve stuck with since day dot—Aquatech.

Seriously, I’ve used their gear for over two decades, in all sorts of gnarly conditions, and I’ve never had a leak. That’s saying something.

If you’re looking to jump into water photography (pun intended), Aquatech is the gear I recommend 100%. It’s built for pros, but still accessible if you’re starting out.

👉 Use my discount code TOMW at checkout to save some coin on your first setup.
Check them out here: Aquatech

Want to Learn How to Use It Properly?

I’ve taught thousands of photographers how to shoot confidently in the water through my online courses and 1-on-1 coaching.

From housing safety checks to dialling in your camera settings, I teach the real-world stuff you actually need to know.

Because water photography ain’t just point and shoot—there’s a bit of an art (and a bit of grunt) to getting those epic shots. I show you how.

The Bottom Line

Water photography isn’t just some fancy extra—it’s a career-changer. It’s helped me get my foot in the door with big clients, make my work stand out in a crowded field, and tell stories that really connect.

So if you’re keen to push your creativity, grow your photography business, or just have more fun out there—grab a water housing and give it a go… And if you want my guidence then visit my photography workshop website HERE

AND Don’t forget to use TOMW at checkout on Aquatech to save a few bucks and get the gear I’ve trusted for two decades… if this interests you?


How to Choose a Photographer in Queensland

Finding the right commercial photographer for your business can make all the difference in how your brand is perceived. Whether you need stunning resort photography, lifestyle imagery, tourism visuals, or product photography, selecting the right professional ensures high-quality results that drive engagement and sales. Here’s what to consider when choosing a commercial photographer in Queensland, particularly in high-demand areas like the Sunshine Coast and Noosa Heads.

Sunshine Coast Photographer Resort Tourism Photography

1. Experience in Various Photography Environments

A top-tier commercial photographer should have experience shooting in diverse conditions. Ask if they can work effectively in:

  • Aerial Photography – Can they provide high-quality drone imagery to showcase large properties, resorts, or landscapes?

  • Water Photography – Do they have specialized gear to capture breathtaking surf, ocean, or poolside images?

  • Studio Photography – Are they skilled in creating controlled lighting setups for product and personal brand shoots?

  • Natural Light & Strobe Photography – Can they adapt to different lighting conditions, whether shooting outdoors in bright sunlight or indoors with flash setups?

  • Challenging Environments – Have they successfully shot in harsh weather, low light, or high-action situations?

Aerial Photography Sunshine Coast

2. Local Expertise in the Sunshine Coast & Noosa Heads

If your business is based in Queensland, particularly on the Sunshine Coast, choosing a photographer familiar with the local scenery, lighting conditions, and best shoot locations is a major advantage. Someone with knowledge of Noosa’s iconic beaches, hinterland retreats, and top resorts can create location-specific imagery that resonates with your audience.

Noosa Heads Sunset Professional Photography Sunshine Coast

3. Professionalism & Reliability

A photographer’s ability to meet deadlines and deliver high-quality work is crucial. Consider these key factors:

  • Portfolio & Past Work – Do they have an extensive portfolio that aligns with your industry?

  • Public Liability Insurance – Are they fully insured to cover any unforeseen incidents on set?

  • Client Reviews & Testimonials – Have past clients praised their professionalism, communication, and ability to deliver results?

  • Turnaround Time – Can they provide edited, high-resolution images within your required timeframe?

Brand Photography Sunshine Coast Surf Industry

4. Ability to Capture Brand Identity & Storytelling

Commercial photography is more than just capturing beautiful images—it’s about telling a story that aligns with your brand. Look for a photographer who:

  • Understands brand aesthetics and marketing objectives

  • Can create imagery that evokes emotion and engages viewers

  • Has worked with businesses similar to yours in tourism, hospitality, lifestyle, or commercial sectors

Sunshine Coast Tourism Images

5. Easy to Work With & Collaborative

A great commercial photographer should be adaptable, easygoing, and a pleasure to work with. Some key aspects include:

  • Strong communication skills – Do they understand your vision and provide clear direction?

  • Flexibility – Are they willing to adjust based on feedback and unexpected changes?

  • Creative input – Can they bring fresh, innovative ideas to enhance your visual content?

6. Post-Production & Editing Skills

Editing is just as important as capturing the right shot. Ensure your photographer provides:

  • Professional retouching and color correction

  • High-resolution images optimized for web, print, and social media

  • Consistent visual style that matches your branding

7. Investment & Value

While budget is always a factor, quality should never be compromised. Investing in a skilled photographer ensures your brand’s visuals stand out in a competitive market. Consider:

  • Do they offer custom photography packages tailored to your needs?

  • Are their rates transparent with no hidden costs?

  • Do they provide long-term value by delivering images that can be used across multiple marketing channels?

brand photography sunshine coast queensland

Final Thoughts

Choosing the right commercial photographer on the Sunshine Coast and Noosa Heads is a crucial decision for any business looking to elevate its brand. By considering experience, professionalism, local expertise, and storytelling ability, you can ensure you find the perfect photographer to bring your vision to life.

Need a Commercial Photographer in Queensland?

If you're looking for high-quality commercial photography services in Noosa, the Sunshine Coast, or Australia-wide, we’d love to help! Contact us today to discuss your next project and let’s create visuals that make an impact.